
Embarking on a journey to explore the mysteries of the night sky, utilizing the power of a telescope, can be a bewildering yet captivating experience. Whether you are a beginner or an advanced stargazer, understanding how to navigate the vast universe above requires careful consideration and knowledge. In this comprehensive guide, we will delve into the intricacies of using a telescope for observing stars and planets, step-by-step. From choosing the right telescope to setting it up and exploring the wonders of the cosmos, we’ll cover it all. So, grab your telescope and prepare to embark on an astronomical adventure that will leave you in awe of the magnificence that lies beyond our world.
Choosing the Right Telescope
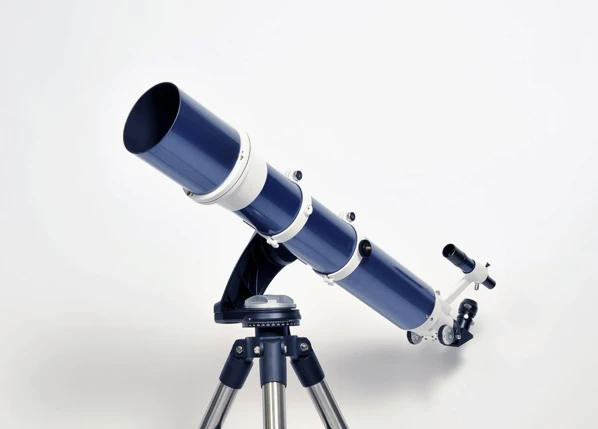
When it comes to choosing the right telescope, there are various factors to consider that will ensure you have the best possible viewing experience. For beginners, it’s important to start with a telescope that is user-friendly and offers a good balance between affordability and performance. Look for telescopes with a larger aperture, as this will allow more light to enter and provide clearer images. Additionally, consider the type of mount that suits your needs, whether it’s an altazimuth or an equatorial mount for more precise tracking. Advanced stargazers may opt for telescopes that offer specialized features such as computerized tracking and astrophotography capabilities, allowing for a deeper exploration of the celestial wonders. Remember, the choice of telescope ultimately depends on your interests and budget, so take the time to research and understand the options available before making a decision. If you’re interested in learning more about the formation and evolution of stars, check out our article on the role of astrophysics in studying stars. Alternatively, if you want to explore the lifecycle of stars, our guide provides detailed information on this fascinating subject.

Considerations for Beginners
When starting out in the world of stargazing, beginners should take several considerations into account, ensuring a smooth and fulfilling experience with their telescopes. Here are some key factors to keep in mind:
1. Type of Telescope: For beginners, a refractor or a reflector telescope is often the most user-friendly option. Refractors are compact and low-maintenance, while reflectors offer a wider aperture for better light gathering.
2. Aperture Size: The aperture size determines the amount of light a telescope can gather. Beginners should aim for a larger aperture size, as it allows for brighter and more detailed images. Look for telescopes with at least a 70mm aperture.
3. Mount Type: There are two main types of mounts: altazimuth and equatorial. Altazimuth mounts are intuitive and easy to use, making them ideal for beginners. Equatorial mounts, on the other hand, allow for smoother tracking and are better suited for astrophotography.
4. Portability: Consider the portability of the telescope. If you plan to bring it to different locations for better viewing opportunities, a portable and lightweight telescope will be more convenient.
5. Additional Accessories: Beginners may benefit from accessories such as finderscopes, which aid in locating objects in the sky, and eyepieces with varying magnifications for different viewing experiences.
6. Price Range: Set a budget that suits your needs and expectations. It’s important to find a telescope that offers good value for money without compromising on quality.
By taking these considerations into account, beginners can choose a telescope that aligns with their interests and provides a smooth introduction to the world of stargazing. Once you have your telescope set up, make sure to check our beginner’s guide to identifying constellations in the night sky to enhance your observing skills and make the most of your stargazing journey.
Advanced Options
When it comes to advanced options for telescopes, there are several features and accessories that can enhance your observing experience. Here are a few options to consider:
1. Computerized Go-To Mounts: These mounts have built-in computer systems that can automatically locate and track celestial objects. Simply input the object you want to observe, and the mount will align itself and track the object as it moves across the sky.
2. Motorized Focusing: Motorized focusing allows for precise adjustments to the focus of your telescope, ensuring you get the clearest view possible. Some telescopes offer automated focusing systems that can be controlled remotely using a computer or smartphone.
3. Filter Wheels: Filter wheels allow you to easily switch between different filters during observations. Filters can enhance the visibility of specific features, such as planetary details or the structures of distant galaxies.
4. Narrowband Filters: Narrowband filters can be used to isolate specific wavelengths of light, such as hydrogen-alpha or oxygen-III. These filters are particularly useful for observing nebulae and other emission objects, as they block out unwanted light pollution.
5. Focal Reducers: Focal reducers decrease the focal length of your telescope, resulting in a wider field of view. This is useful for capturing larger objects or panoramic views of star clusters and galaxies.
6. Barlow Lenses: Barlow lenses are used to increase the magnification of your telescope. By incorporating a Barlow lens, you can effectively double or triple the magnifying power of your eyepieces, allowing for closer examination of planetary details.
7. Night Vision Devices: Night vision devices, like image intensifiers or digital night vision cameras, can be attached to your telescope to observe the night sky in low-light conditions. These devices amplify the available light, making it easier to see faint objects and details.
Remember, advanced options can add complexity and cost to your telescope setup, so consider your observing goals and budget before investing in these accessories. Each option brings its own advantages and considerations, so take the time to research and evaluate which options will best suit your specific needs.
Setting Up Your Telescope
Setting up your telescope properly is crucial to ensure optimal performance and accurate observations. Begin by assembling the components of the telescope, which may include the optical tube, mount, tripod, and accessories. Follow the manufacturer’s instructions carefully to avoid any mishaps. Once the telescope is assembled, it’s essential to align and calibrate it for accurate tracking. This involves leveling the tripod, aligning the finderscope with the main telescope, and polar aligning if using an equatorial mount. Proper alignment will help you navigate the night sky with ease. Additionally, make sure to familiarize yourself with the different controls and adjustments, such as the focus knob and magnification settings, as these will be pivotal in achieving clear and detailed views of celestial objects. By taking the time to set up your telescope correctly, you’ll be well on your way to unlocking the wonders of the universe.
Assembling Your Telescope
Assembling your telescope is an important first step in preparing for a night of stargazing. Start by familiarizing yourself with the components of your telescope. Carefully unpack each part, ensuring that all pieces are present and undamaged. Begin by attaching the tripod legs securely, using the provided screws or fasteners. Once the legs are in place, attach the mount head to the tripod. Make sure it is securely fastened to avoid any wobbling during observation. Next, attach the optical tube to the mount head, aligning it properly. Use the provided knobs or screws to tighten it in place but be careful not to overtighten. Once the optical tube is secure, you can attach the finderscope, which will help you locate celestial objects. Align it with the main telescope and tighten the screws. Finally, attach the eyepiece to the focuser and ensure it is securely fitted. Make sure to rotate the focus knob to bring the eyepiece into focus. Remember to handle your telescope with care during assembly, avoiding any unnecessary force or rough handling. With your telescope fully assembled, you are now ready to move on to the next step in your astronomical adventure.
Aligning and Calibrating
Aligning and calibrating your telescope is an essential step to ensure accurate and precise observations of the stars and planets. Here are some key steps to follow:
1. Find a Level Ground: Start by setting up your telescope on a level and stable surface. This provides a solid foundation for accurate alignment.
2. Use a Finder Scope: Most telescopes come with a finder scope, a smaller telescope attached to the main instrument. Align the finder scope with the main telescope by adjusting its alignment screws, making sure it is pointing in the same direction as the main telescope.
3. Choose an Alignment Star: Select a bright star in the sky that is easily identifiable. Ideally, choose a star that is close to the celestial equator, as it will help with the alignment process.
4. Center the Star: Using the controls on your telescope, move the telescope until the chosen alignment star is in the center of the field of view. This may require adjustments to the altitude and azimuth controls.
5. Fine-Tune the Alignment: Look through the main telescope eyepiece and make further adjustments to center the alignment star precisely. Use the slow-motion controls to make small, precise movements.
6. Verify Alignment: Once the alignment star is properly centered, you can confirm the alignment by looking through the finder scope again. If the star remains centered in both scopes, your alignment is successful.
7. Calibrate the Go-To Function (if applicable): If your telescope has a computerized Go-To function, it is essential to calibrate it. Follow the manufacturer’s instructions for calibrating the Go-To function by selecting a few bright stars to align with.
By properly aligning and calibrating your telescope, you will be able to accurately locate and track celestial objects in the night sky. Take the time to familiarize yourself with the specific alignment procedures outlined in your telescope’s manual as different models may have slightly different processes.
Observing Stars
Observing stars through a telescope allows us to unlock the secrets of the cosmos and marvel at the beauty of distant celestial bodies. To start, it’s crucial to familiarize yourself with the night sky and learn how to identify stars and constellations. Use star charts or smartphone apps to guide your exploration, and consider investing in a red LED flashlight to preserve your night vision. When observing stars, adjusting the magnification and focus will help you achieve clear and detailed views. Experiment with different eyepieces to find the best combination of magnification and field of view for your observations. Additionally, keeping a record of your observations, whether through sketches or notes, can enhance your understanding and serve as a memorable keepsake of your stargazing journey. So grab your telescope, venture outdoors, and prepare to be mesmerized by the vast and awe-inspiring expanses of the night sky.
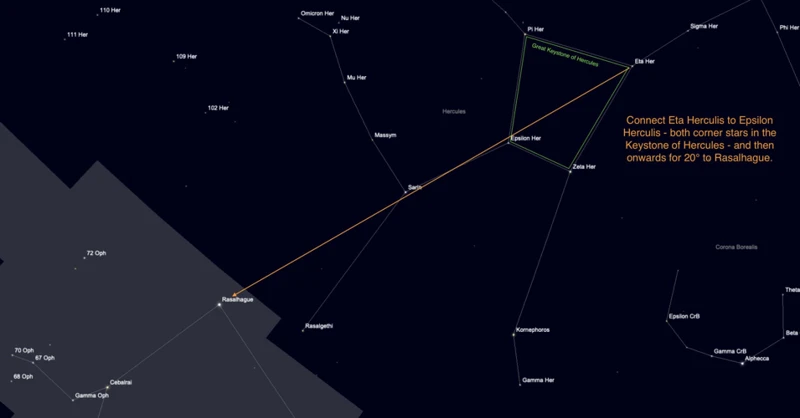
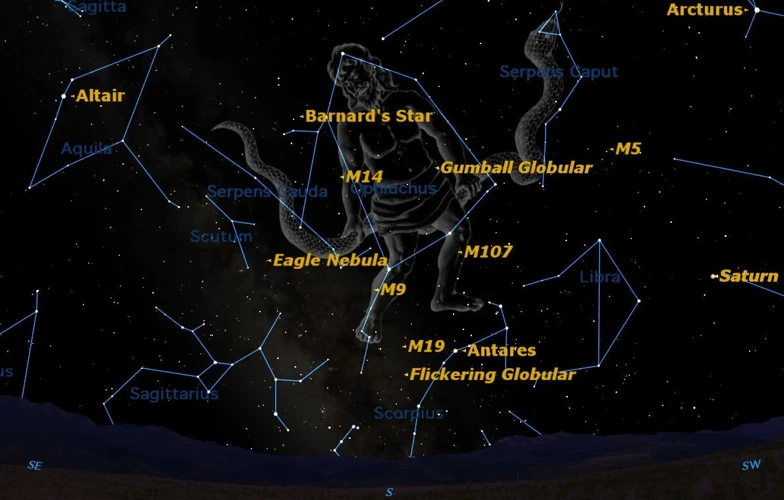
Identifying Stars and Constellations
When it comes to identifying stars and constellations, there are a few key techniques and tools that can help you navigate the night sky with confidence. One of the first things to familiarize yourself with is a star chart or a planisphere. These handy tools provide a map of the night sky that you can align with the actual positions of stars and constellations. By rotating the chart to match the date and time, you can easily identify what stars and constellations are visible from your location. Another useful technique is to locate prominent stars and use them as reference points to spot constellations. For example, finding the bright star Vega can lead you to the constellation Lyra. Additionally, learning recognizable patterns within constellations, such as Orion’s Belt or the Big Dipper, can serve as anchors for identifying other stars and constellations nearby. Applying the mnemonic technique of connecting stars to form memorable shapes, like the W-shaped Cassiopeia or the S-shaped Serpens, can also be helpful. Don’t forget to take into account light pollution, which can impact the visibility of stars and constellations. By escaping to darker areas or using filters to reduce light pollution, you can enhance your observing experience. So grab your star chart, planisphere, or astronomy app, and let the journey of discovering stars and constellations begin.
Adjusting Magnification and Focus
Adjusting Magnification and Focus:
1. Start by selecting the appropriate eyepiece for your desired magnification level. Different eyepieces offer different levels of zoom, allowing you to get a closer look at celestial bodies. Experiment with different eyepieces to find the one that best suits your needs.
2. Once you have chosen the eyepiece, insert it into the focuser of your telescope. Make sure it is securely in place.
3. With the eyepiece in position, adjust the focus knob or rack and pinion mechanism on your telescope. Slowly turn the focus knob, moving it clockwise or counterclockwise, until the image becomes sharp and clear. Take your time with this step, as achieving precise focus is crucial for a detailed view of stars and planets.
4. After achieving focus, you may want to fine-tune the magnification level. This can be done by switching to a different eyepiece with a higher or lower focal length, depending on whether you want to zoom in or widen your field of view.
5. It’s important to note that increasing the magnification may result in a dimmer image or reduced field of view. Experiment with different magnification levels to find the balance that offers the best view for your observations.
6. If your telescope has a Barlow lens, you can use this accessory to further increase the magnification. A Barlow lens is inserted between the telescope and the eyepiece, effectively doubling or tripling the magnification power. This can be useful for observing planets or other objects that require higher magnification.
7. Once you have adjusted the magnification and achieved focus, take the time to enjoy the view. Spend some time observing different celestial objects, noting any interesting features or details you may come across.
Remember, practice makes perfect when it comes to adjusting magnification and focus on your telescope. With time and experience, you will become more proficient in finding the ideal settings for your observations.
Recording Observations
Recording observations is an essential part of stargazing and can greatly enhance your astronomical journey. Here are some tips to help you effectively record your observations:
- Keep a Journal: Maintain a dedicated notebook or journal to record your observations. Include the date, time, and location of each observation session. Note down the objects you observed, details of their appearance, and any specific features or details that stood out to you.
- Sketching: Enhance your notes by sketching what you see through the telescope. Even simple drawings can capture important details that might be missed in written descriptions. Use different shades or colors to depict varying levels of brightness or contrast in celestial objects.
- Use Descriptive Language: While recording your observations, use descriptive language to accurately portray what you see. Include details such as color, size, shape, and any distinguishing features. Be as specific as possible to ensure your observations can be understood by others.
- Photography: If you have a camera attachment for your telescope, consider taking photographs of your observations. This allows you to capture images of objects that can be challenging to replicate through sketches alone. Keep in mind that astrophotography requires some skill and practice, so be patient as you learn this technique.
- Online Resources: Share your observations and connect with the wider astronomy community by utilizing online resources. There are numerous websites and forums dedicated to amateur astronomy where you can post your observations, seek advice, and engage in discussions with fellow enthusiasts.
- Organize Your Data: As your collection of observations grows, it is important to organize your data for easy retrieval and analysis. Consider categorizing your observations by object type, location, or other relevant criteria. This will enable you to compare and study your observations in a more systematic manner.
By maintaining a record of your observations, you not only create a personal reference that allows you to track your progress as an astronomer but also contribute to the collective knowledge of the stargazing community.
Observing Planets

Observing planets through a telescope can be a thrilling experience, where you can catch a glimpse of the fascinating features and movements of these celestial bodies. To locate planets in the sky, use a star chart or a sky mapping app to determine their positions relative to prominent stars or constellations. Once you’ve found the planet you’re interested in, take note of its unique characteristics and features. Some planets, like Jupiter, offer a mesmerizing view of its iconic bands and swirling storms, while others, like Mars, reveal surface details such as polar caps and dust storms. Tracking planetary motion requires the use of slow-motion controls on your telescope mount, which allow you to follow the planet as it moves across the night sky. By mastering the art of observing planets, you can expand your understanding of our solar system and appreciate the wonders that exist beyond our Earthly realm.
Locating Planets in the Sky
Identifying and locating planets in the vast expanse of the night sky can be a thrilling endeavor for any astronomy enthusiast. Here are some key steps to help you in your quest:
1. Know the Planet’s Position: Start by familiarizing yourself with the current positions of the planets. Numerous astronomy apps and websites can provide you with real-time data on planetary locations. Understanding the planet’s position relative to the horizon and other celestial objects will greatly assist you in locating it.
2. Use Sky Maps: Consult sky maps or star charts to determine the path of the planets across the sky. These maps provide valuable information about the planet’s trajectory and can assist you in identifying the general vicinity where the planet can be found.
3. Observe During Appropriate Times: Planets are visible at different times throughout the night and year. Timing your observation sessions during the right period increases your chances of spotting a planet. For instance, some planets are best observed during the early morning hours, while others are more prominent during specific seasons.
4. Look for Brightness and Steadiness: Planets are typically brighter and steadier than stars. Their appearance resembles tiny, non-twinkling points of light. Scan the sky visually or use your telescope’s finder scope or low magnification eyepiece to locate the planet’s distinct light.
5. Use Stellar Signposts: Nearby bright stars can act as helpful markers for locating planets. By referencing a star chart and identifying specific stars in relation to the planet, you can navigate your telescope more accurately.
6. Adjust Magnification: Once the planet is in view, adjust the magnification of your telescope to observe it in more detail. Higher magnification can reveal planetary features such as moons, cloud bands, or surface textures (depending on the planet).
Remember, patience and persistence are key when locating planets in the sky. It may take a few attempts before you successfully spot a planet, especially if light pollution or atmospheric conditions are present. However, with practice and a bit of celestial navigation, you’ll soon be rewarded with breathtaking views of our neighboring planets.
Understanding Planetary Features
Understanding planetary features is a crucial aspect of observing planets through a telescope. By familiarizing yourself with the unique characteristics and structures of different planets, you can gain deeper insights into their composition and behavior. Here are some key points to consider when it comes to understanding planetary features:
1. **Surface Features**: Planets like Mars and the Moon have distinctive surface features that can be observed through a telescope. Look for craters, mountains, valleys, and other geological formations. These features give clues about a planet’s history and can help scientists understand its geological processes.
2. **Atmospheric Conditions**: Some planets, such as Jupiter and Saturn, have prominent atmospheric features, including bands, storms, and cloud formations. These features change over time, providing a dynamic view of the planet. Pay attention to these atmospheric conditions and observe any changes or patterns during your observations.
3. **Moons and Rings**: Many planets in our solar system have moons and ring systems. Saturn’s rings, for example, are a stunning sight through a telescope. Pay attention to the number, size, and arrangement of moons and rings around the planet you are observing, as they contribute to the planet’s overall characterization.
4. **Color Variations**: Different planets exhibit variations in color, which can be observed through a telescope. For instance, Uranus and Neptune display subtle shades of blue, while Mars often appears reddish. These color variations can indicate different chemical compositions or atmospheric components.
5. **Transits and Events**: Occasionally, planetary features like eclipses, transits, or occultations occur, where one celestial object passes in front of another. These events provide unique opportunities for observation and can offer valuable insights into a planet’s behavior and orbit.
By understanding these planetary features, you can enhance your observations and deepen your understanding of the planets in our solar system. Take notes, sketch what you see, and compare your observations with astronomical resources to expand your knowledge further. Remember, each planet offers its own captivating wonders waiting to be discovered through the lens of your telescope.
Tracking Planetary Motion
Tracking the motion of planets is crucial for accurate observation and study. As the planets move across the sky, it is important to keep them within the field of view of your telescope. One effective method for tracking planetary motion is by using the slow-motion controls on your telescope mount. These controls allow you to make precise adjustments to compensate for the apparent motion of the planets caused by the Earth’s rotation. By gently turning the slow-motion knobs, you can keep the planet centered in the eyepiece as it moves, allowing for extended periods of observation without losing sight of the planet.
Another technique for tracking planetary motion is by using an equatorial mount. Equatorial mounts are specifically designed to align with the Earth’s axis, allowing for smooth and accurate tracking of celestial objects. By aligning the mount with the celestial pole, you can track the planets as they follow their respective paths across the sky. To align the mount, locate the celestial pole using a guide star or a smartphone app, and adjust the telescope’s mount accordingly. Once the mount is aligned, tracking the motion of planets becomes easier, as the mount will move in sync with the rotation of the Earth, keeping the planets in view for longer periods of time.
It is also worth noting that different planets have different apparent speeds across the sky due to their varying distances from Earth and orbital velocities. For example, the inner planets like Mercury and Venus appear to move relatively quickly, while the outer planets like Jupiter and Saturn have a slower apparent motion. Understanding the orbital characteristics of each planet can also help in predicting their motion and adjusting the tracking accordingly.
By mastering the art of tracking planetary motion, you can ensure a more immersive and rewarding observing experience. Not only will you be able to observe the details and features of planets more accurately, but you will also have the opportunity to study their behavior and changes over time. So, take the time to practice tracking techniques with your telescope and discover the wonders of planetary motion in the night sky.
Advanced Techniques and Accessories
For those seeking to elevate their stargazing experience, there are a variety of advanced techniques and accessories that can enhance the capabilities of your telescope. One such technique is astrophotography, which allows you to capture stunning images of celestial objects. By attaching a camera to your telescope, you can immortalize breathtaking images of galaxies, nebulae, and even distant planets. Additionally, using filters and eyepieces can help optimize your view by reducing light pollution and enhancing specific wavelengths of light. These accessories can bring out finer details in planetary features or make faint deep-sky objects more visible. Another important aspect of advanced telescope usage is collimation, the alignment of the optical elements. Regularly calibrating and collimating your telescope ensures that you are getting the sharpest and most accurate views possible. Whether you’re capturing mesmerizing astrophotos or fine-tuning your telescope’s optics, exploring these advanced techniques and accessories will take your astronomical adventures to new heights.
Astrophotography with a Telescope
Capturing the beauty of the night sky through astrophotography is an exciting and rewarding endeavor that allows you to share your celestial experiences with others. Astrophotography with a telescope opens up a world of possibilities, allowing you to capture stunning images of stars, planets, and even deep-sky objects. To get started, you’ll need a telescope with a sturdy mount, capable of handling the weight of photography equipment. Additionally, consider investing in a camera adapter or a dedicated astrophotography camera to attach to your telescope. These tools enable you to achieve long-exposure shots, capturing the intricate details and colors of celestial objects. **Calibration** is crucial for achieving sharp and accurate images. This involves aligning your telescope, focusing on the desired object, and adjusting exposure settings to capture the perfect image. Experimenting with different filters can also enhance the quality of your astrophotography, reducing light pollution and improving contrast. As you delve deeper into astrophotography, you can even explore more advanced techniques such as stacking multiple exposures to reveal finer details. Remember, astrophotography requires patience, practice, and a willingness to learn from each attempt. So, grab your camera and telescope, and immerse yourself in the mesmerizing world of astrophotography, capturing the wonders of the universe one frame at a time.
Using Filters and Eyepieces
Using filters and eyepieces can greatly enhance your observing experience with a telescope. Filters allow you to selectively block certain wavelengths of light, enhancing the visibility of specific objects or features. There are various types of filters available, each serving a different purpose. For example, a moon filter can reduce the brightness of the moon, making it easier to observe without glare. A nebula filter can enhance the contrast of nebulae, bringing out their intricate details. Similarly, a planetary filter can help to reveal the subtle features of planets, such as cloud bands on Jupiter or the polar ice caps on Mars. When using filters, it’s important to remember to attach them to the eyepiece, not the telescope itself. Eyepieces, on the other hand, determine the magnification and field of view of your telescope. They come in different focal lengths, and selecting the right eyepiece can make a significant difference in what you see. Shorter focal length eyepieces provide higher magnification and a narrower field of view, while longer focal length eyepieces offer lower magnification and a wider view. Experimenting with different eyepieces will allow you to find the optimal balance between magnification and field of view for your specific observations. Remember to always clean your eyepieces and filters properly to maintain their performance. Storing them in protective cases when not in use is also essential to prevent any damage or scratches. By utilizing filters and choosing the right eyepieces, you can unlock a whole new level of detail and clarity in your astronomical observations.
Collimating Your Telescope
Collimating your telescope is an essential task that ensures optimal performance and image quality. It involves aligning the optical components of the telescope, specifically the mirrors or lenses, to achieve proper alignment and focus. Here are the steps to collimate your telescope:
- Check the alignment: Start by inspecting the alignment of the primary and secondary mirrors or lenses. Look for any signs of misalignment or tilt.
- Adjust the primary mirror: If the primary mirror is misaligned, you can adjust it by using the collimation screws. These screws are usually located at the back of the telescope. Make small adjustments at a time and periodically check the alignment by observing a distant object through the eyepiece.
- Align the secondary mirror: Next, align the secondary mirror by adjusting its tilt. This can be done by loosening the screws that hold the secondary mirror in place and gently tilting it to achieve proper alignment with the primary mirror.
- Use a collimation tool: To ensure precise collimation, you can use a collimation tool such as a collimation cap or a laser collimator. These tools help in determining the alignment of the mirrors and provide visual aids for adjustment.
- Repeat the process: After making adjustments, it is important to repeat the process and double-check the alignment to ensure accuracy. Keep making small adjustments until the mirrors are perfectly aligned.
Collimating your telescope may seem challenging at first, but with practice and patience, you will become familiar with the process. Remember to refer to your telescope’s instruction manual for specific collimation procedures, as the steps may vary depending on the type and model of your telescope. Regular collimation will ensure that your telescope delivers sharp and clear views of the stars and planets, maximizing your observing experience.
Troubleshooting and Maintenance
Even the most well-maintained telescopes can encounter issues from time to time, but fear not, troubleshooting and maintenance can help keep your telescope in optimal condition. When faced with common issues like blurry images or difficulty focusing, start by checking the alignment and calibration of your telescope. Ensure that all components are securely fastened and that the optics are clean and free from dust or debris. If you’re still experiencing problems, refer to the manufacturer’s instructions or seek guidance from online forums and communities, where fellow enthusiasts can offer their expertise. When it comes to maintenance, regularly cleaning your telescope’s optics, including the lenses and mirrors, is crucial for clear and sharp observations. Use specialized tools and solutions designed for telescope cleaning to avoid damaging the delicate surfaces. Additionally, store your telescope in a dry and dust-free environment when not in use, and protect it from extreme temperatures. By following these troubleshooting and maintenance practices, you can prolong the life of your telescope and ensure continued enjoyment of the celestial wonders it unveils.
Common Issues and Solutions
When using a telescope, it’s not uncommon to encounter a few issues along the way. To help you navigate through these challenges, here are some common problems and their solutions:
1. Blurry Images: If you’re experiencing blurry images, the most likely culprit is incorrect focus. Try adjusting the focus knob slowly until the image becomes crisp and clear. Additionally, make sure the telescope is properly aligned and calibrated.
2. Collimation Problems: Collimation refers to the alignment of the telescope’s mirrors or lenses. If you notice distorted or misaligned images, it may be due to collimation issues. Use a collimation tool or follow the manufacturer’s instructions to realign the optics.
3. Motor Malfunction: For telescopes with motorized mounts, motor malfunctions can occur. If the tracking or slewing functions are not working correctly, check if the power source is connected securely and functioning. You may also need to recalibrate the mount or contact the manufacturer for further assistance.
4. Light Pollution: Light pollution can hinder your viewing experience, especially when observing faint celestial objects. To mitigate this issue, try observing from a darker location or use light pollution filters to improve contrast and visibility.
5. Dew on Optics: In humid conditions, dew can accumulate on the telescope’s optics, resulting in reduced clarity. Use a dew shield or heater strip to prevent dew formation. If dew does occur, gently wipe the optics with a clean, lint-free cloth.
6. Keep Instruments Clean: Regularly clean the eyepieces and lenses of your telescope to maintain optimal performance. Use a soft brush or compressed air to remove dust particles, and a specialized cleaning solution for tough stains.
Remember, each telescope model may have its own unique set of issues, so always consult the manufacturer’s manual for troubleshooting tips specific to your telescope. Don’t let these common problems discourage you; with a little patience and practice, you’ll be able to overcome them and enhance your stargazing experience.
Cleaning and Storing Your Telescope
Cleaning and properly storing your telescope is critical for maintaining its performance and longevity. Here are some essential steps to ensure your telescope remains in top condition:
1. Dusting: Start by gently removing dust particles from the telescope’s exterior using a soft, lint-free cloth or a brush specifically designed for optics. Be careful not to apply excessive pressure or scratch the delicate surfaces.
2. Cleaning Optics: To clean the telescope’s lenses and mirrors, use a specialized lens cleaning solution and lens tissue or microfiber cloth. Apply a small amount of the cleaning solution to the tissue or cloth and gently wipe the optics in a circular motion. Avoid using regular household cleaning products or tissues as they may contain harmful chemicals or rough fibers.
3. Removing Stains: Stubborn stains that cannot be removed with the cleaning solution may require a mild detergent specially formulated for optics. Dilute the detergent with water, dampen a clean cloth, and gently wipe the affected area. Rinse with clean water and allow the optics to air dry.
4. Collimating: Regularly check and adjust the collimation of your telescope. Collimation refers to aligning the optical elements to ensure optimum performance. Consult your telescope’s manual for specific instructions on collimation procedures.
5. Storage: When not in use, store your telescope in a cool, dry place to prevent moisture buildup. Use protective covers or cases to shield it from dust, sunlight, and accidental bumps. Consider disassembling the telescope if you have limited space, but be cautious when handling the delicate components.
6. Tripod Care: If your telescope is mounted on a tripod, clean and maintain it regularly. Wipe off any dirt or debris from the legs and ensure the locking mechanisms are tight but not overly tightened. Lubricate any moving parts as recommended by the manufacturer.
By following these cleaning and storage practices, you can prolong the lifespan of your telescope and ensure optimal performance for years to come. Remember to always refer to your telescope’s manual for specific cleaning instructions and maintenance guidelines. Taking proper care of your telescope will not only enhance your observing experience but also protect your valuable investment.
Conclusion
In conclusion, mastering the art of using a telescope for observing stars and planets opens up a world of celestial wonders that many only dream of. Throughout this guide, we have explored the different aspects of this captivating hobby, from choosing the right telescope to setting it up, identifying stars and constellations, observing planets, and delving into advanced techniques and accessories. By following the step-by-step instructions and tips provided, you can embark on a journey through the vastness of the night sky and develop a deeper understanding of the universe we inhabit. Remember to take your time and be patient, as becoming a skilled observer takes practice and perseverance. Record your observations and keep a logbook to track your progress and discoveries along the way. Whether you aim to capture stunning astrophotography images or simply want to gaze at distant planets, the gratification of exploring the cosmos with your own telescope is unparalleled. So, gather your equipment, venture outside on clear nights, and let your curiosity guide you as you uncover the mysteries of the stars and planets. Happy stargazing!
Frequently Asked Questions
1. Can I use a telescope to see distant galaxies?
Yes, telescopes can reveal distant galaxies, especially those with larger apertures that allow more light to enter. However, keep in mind that the visibility of galaxies depends on factors such as light pollution, atmospheric conditions, and the specific specifications of the telescope.
2. How do I find specific constellations when observing stars?
There are various methods to locate constellations. You can use star maps or astronomy apps that provide real-time sky charts to guide you. Additionally, learning to identify prominent stars and using recognizable star patterns known as asterisms can help in finding specific constellations.
3. Can I observe planets during the day with a telescope?
Observing planets during daylight is challenging due to the bright sky. Planetary observations are best done at night or during twilight when the planets are above the horizon and the sky is dark. However, some planets like Venus can occasionally be visible during the day when conditions are favorable.
4. How do I clean my telescope’s lenses and mirrors?
Cleaning telescope optics requires utmost care. Always follow the manufacturer’s instructions. Typically, a blower brush can be used to remove loose debris, followed by gently wiping the surface with a lens cleaning solution and a microfiber cloth. Avoid touching the lenses and mirrors with your fingers.
5. Can I observe stars without a telescope?
Absolutely! Many stars are visible to the naked eye, especially in areas with minimal light pollution. Observing stars without a telescope allows you to appreciate the beauty of the night sky in its entirety. You can also use binoculars to enhance your stargazing experience.
6. How can I capture images of celestial objects with my telescope?
To capture images of celestial objects, you can engage in astrophotography. This involves using specialized cameras, adapters, and software to capture long-exposure images. It requires practice and knowledge of the unique settings and techniques involved in astrophotography.
7. Do I need a tripod for my telescope?
Not all telescopes require tripods. Depending on the type and design of the telescope, some may come with built-in mounts that eliminate the need for a separate tripod. However, for telescopes that require a tripod, it is crucial to choose a sturdy and adjustable one for stability during observing sessions.
8. Can I observe the northern lights with a telescope?
The northern lights, also known as the Aurora Borealis, are best observed with the naked eye or through a camera with a wide-angle lens. Telescopes are not typically used to observe the northern lights because they require a broader field of view to capture the grandeur of the phenomena.
9. Why is collimating my telescope important?
Collimating a telescope involves aligning the optical components for optimal performance. It ensures that the light path through the telescope is properly focused, resulting in sharper and clearer views. Regularly collimating your telescope is vital to maintain its accuracy and maximize image quality.
10. Can I observe planets and stars from a city with high light pollution?
Observing celestial objects from cities with high light pollution can be challenging but not impossible. Light pollution filters and narrowband filters can help mitigate the effects of light pollution, allowing for some level of planetary and stellar observation. However, for the best experience, it is recommended to visit dark-sky locations away from city lights.


